HopHeadSaid
  • Blog
  • pintsandpairings
  • ABOS

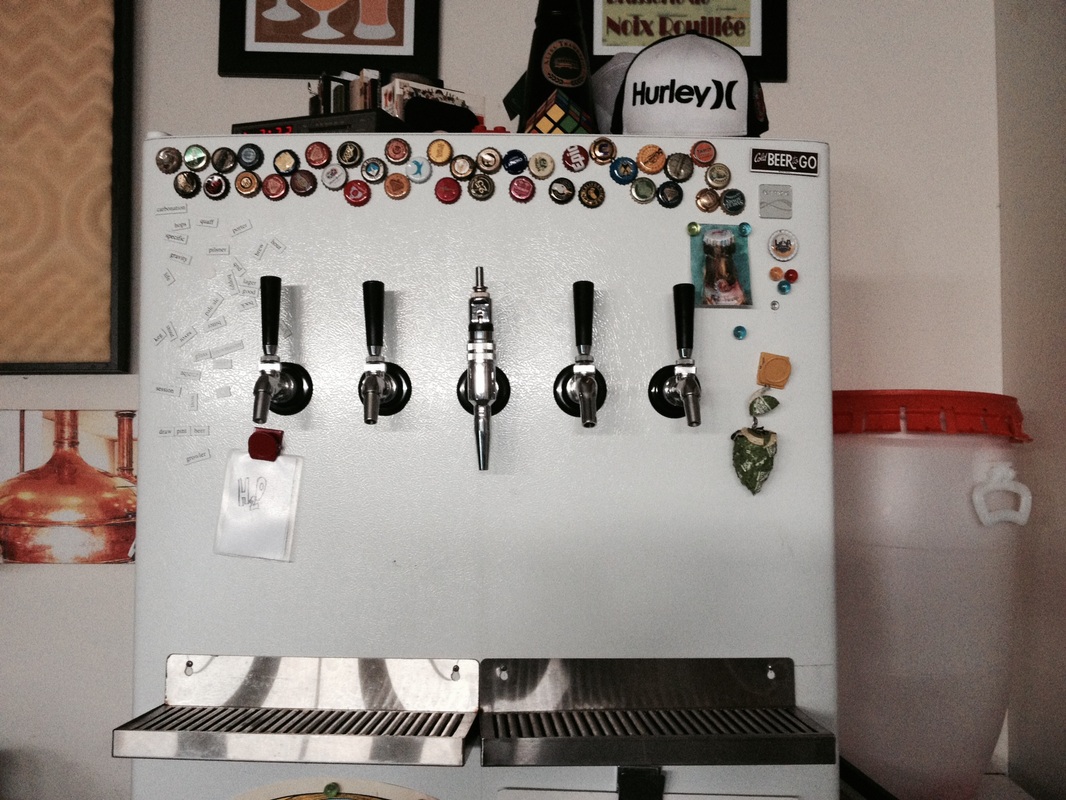
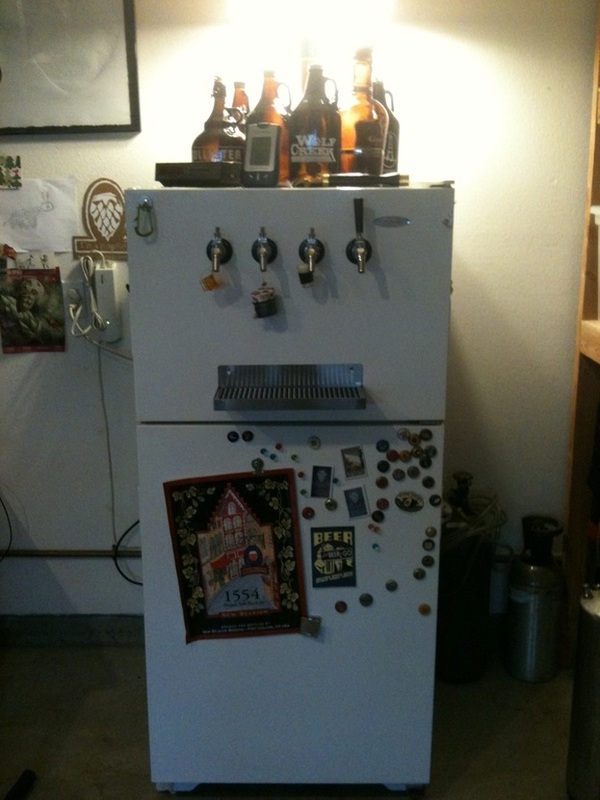
New Kegerator

10/1/2013

2 Comments

 
Disclaimer: This is only a journal of what I did to my refrigerator, use any of this narrative at your own risk, you are responsible for your own actions and you are responsible for any damage to property or person, yadda, yadda, yadda.  Make sure the refrigerator is unplugged before you start cutting AND make sure you know where all the coolant lines, electrical lines or any other important refrigerator features are before you start cutting.  If you aren't sure then don't do this
Picture
Picture
Picture
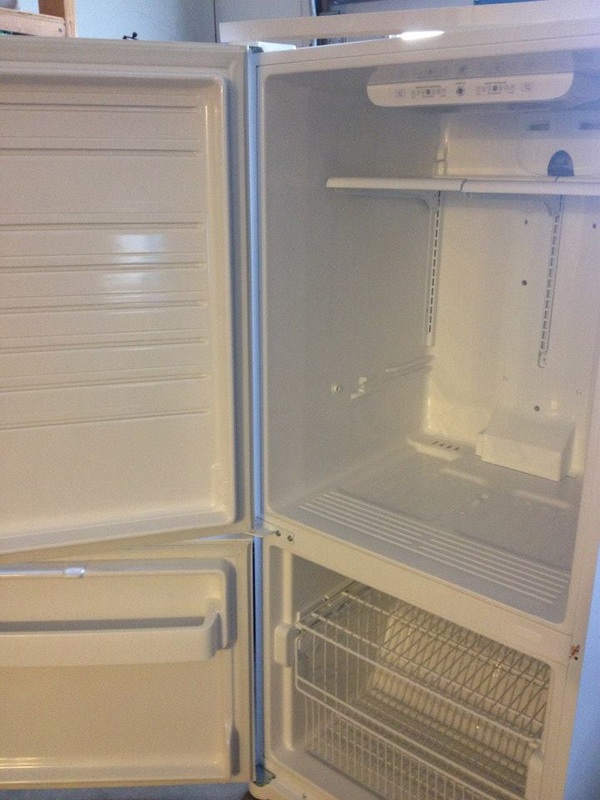
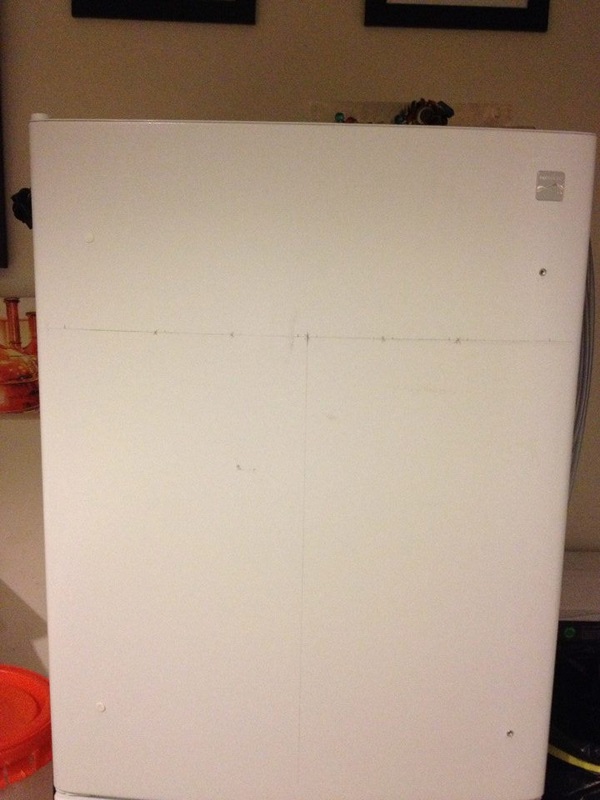
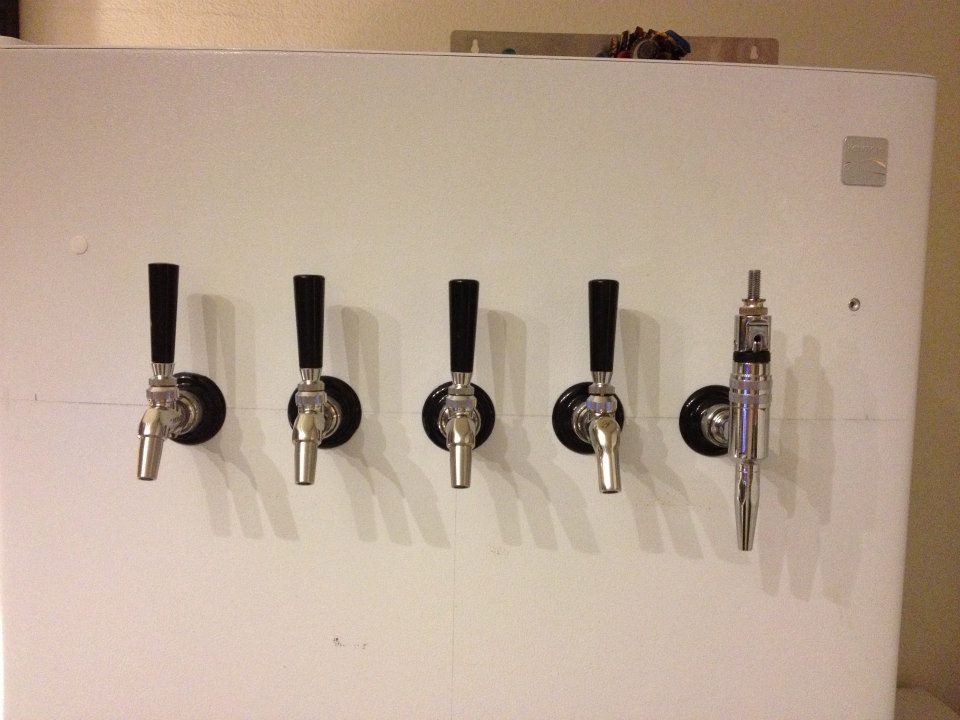
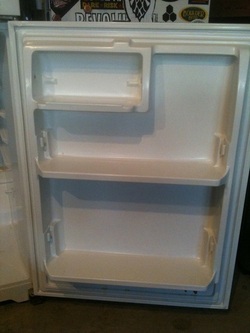
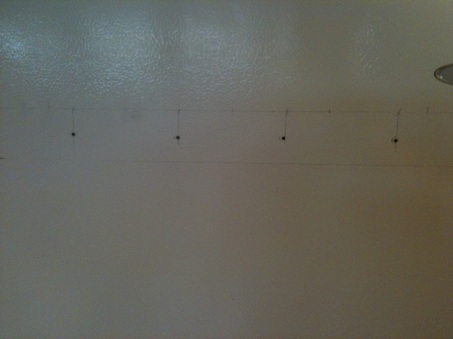
This particular model (Kenmore 795.69002.900) was really easy to convert because the drawers weren't molded into the plastic. All I had to do was take out all the door drawers and give it a good cleaning and it was ready to go.  The first step was to draw the horizontal tap line at the height I wanted and then find the middle line to start my tap measurements.  
Picture
Picture
Step 2: Prep for draught components.

The planning part is pretty straight forward.  Find the vertical center of the door and mark it with a pencil.  Next plan for the horizontal height of your taps. Keep in mind that your tap handles will be at least four inches (maybe more) higher than your holes.  This is important especially if the handle height will impede the freezer door from opening or if the handles will stick out above the top of the fridge. The latter can be a mild to major annoyance if you use the top of your fridge as a shelf, like I do, and accidentally hit the tap handle and pour beer all over the floor.

After you have decided on the horizontal line, use a level for this step, measure out 2 inches or more to the left an right of the middle line and mark your first two tap holes.  Measure out 4 inches (or the same interval you used for the first two holes) from each of those marks and mark the next two holes.  Repeat as needed.  

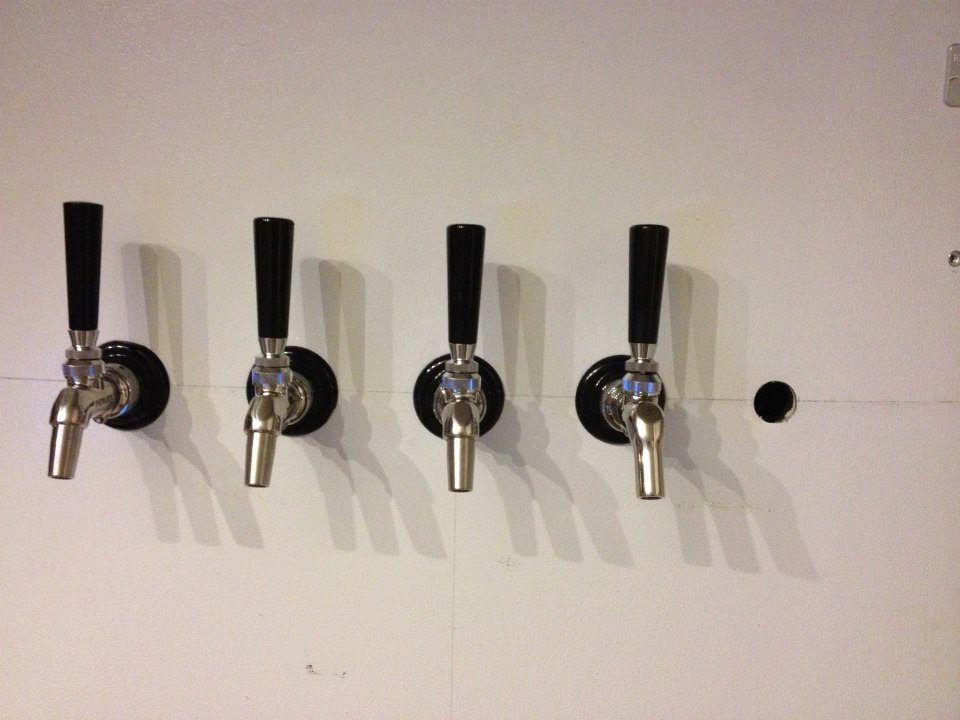
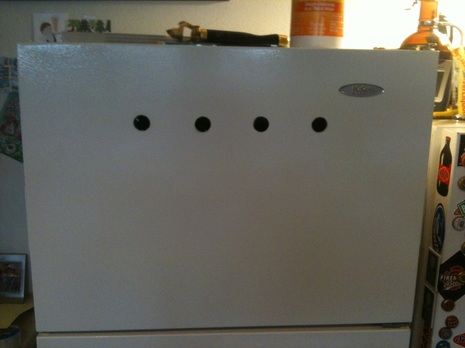
Drill pilot holes on each of your marks.  This will help guide your hole saw.  Just a quick note on hole saws. Spend the extra $10 and get a quality metal hole saw. Sometimes you can find these at at homebrew shops and you can bet that they will be the correct size for your tap shanks, that way.  I used a cheap hole saw on my first fridge and it tore the metal apart and it fell apart after one hole.  Luckily the tap collar covered up the mess but I learned my lesson and now I am passing that nugget on to you.

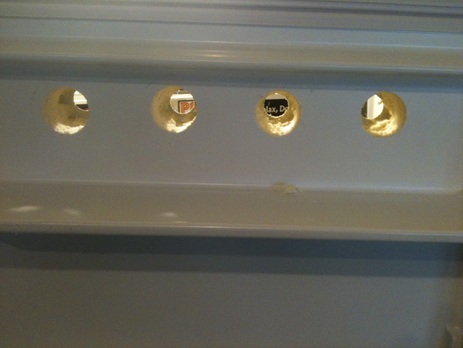
Drill through from the outside first and the tapping part of the hole saw will probably come through the plastic or foam on the inside of the door. This will give you a guide to follow so you can clean out the foam around each of the tap holes from the inside. Use a regular wood/plastic hole saw to enlarge the hole on the inside but do not cut through the door.  You are only doing this to make the inside hole big enough so the shank collar nut, the part that secures the tap to the refrigerator door, will tighten securely to the metal part of the refrigerator door.

For more detailed directions please read this post.
Picture
Picture
Picture
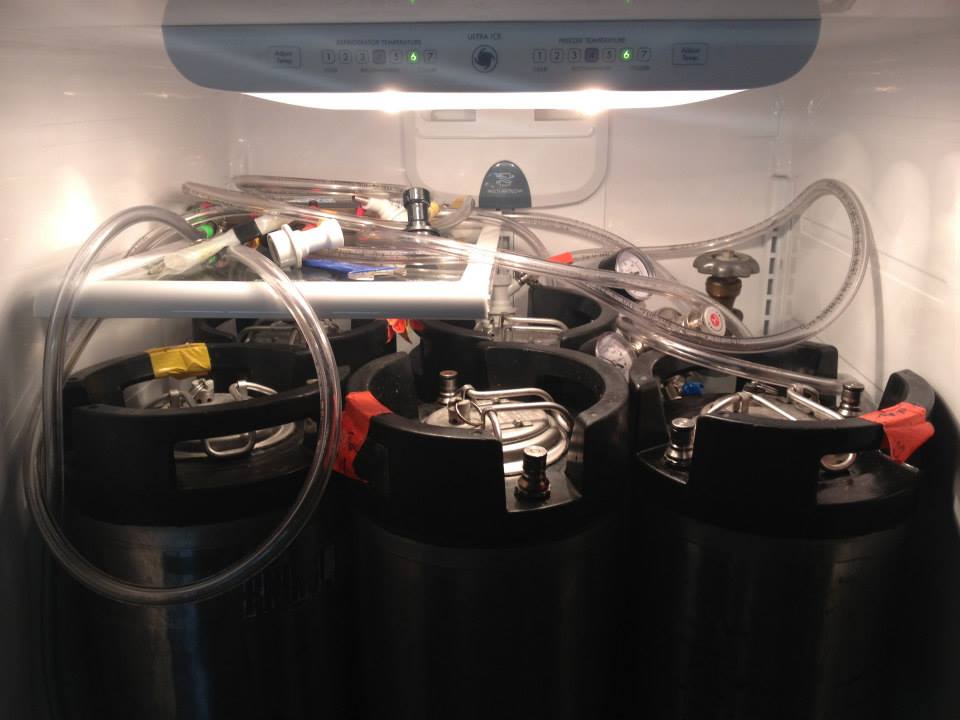
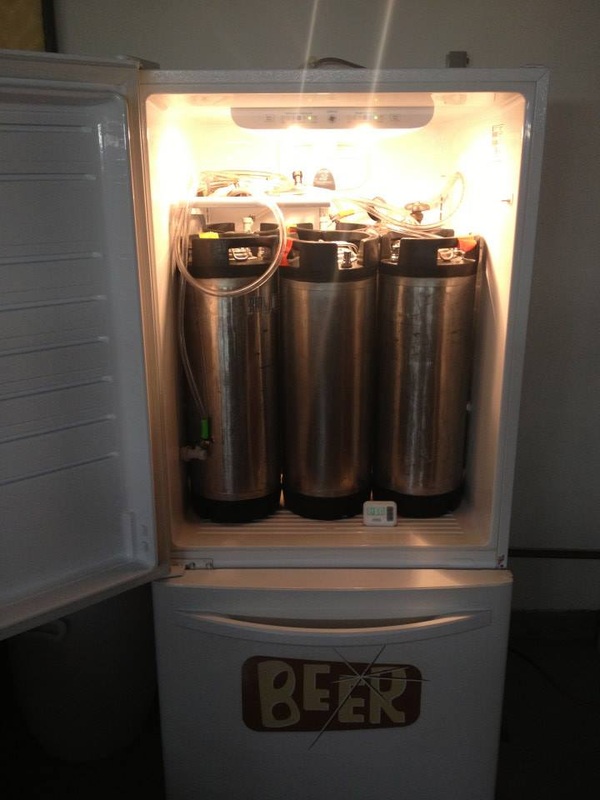
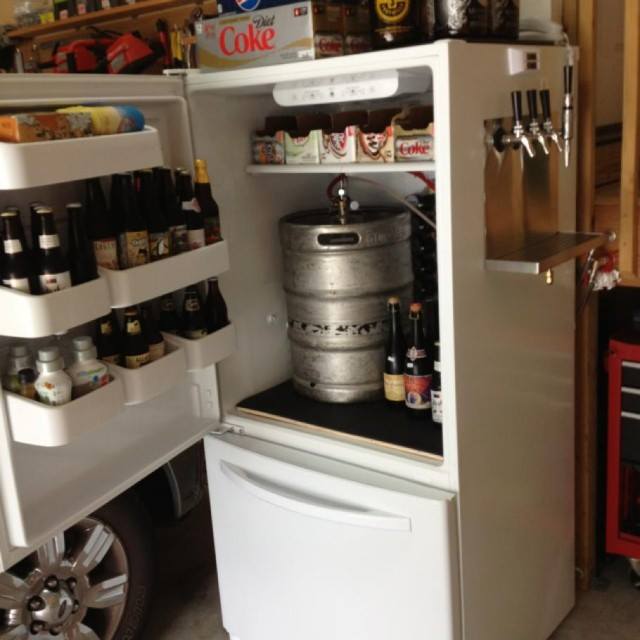
-It is snug in there with 5 kegs but it would fit one more if I were to take out the CO2 tank. 
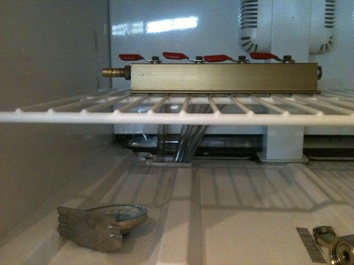
-The half tray system in this fridge is really nice because it gives the CO2 tank the extra head room it needs and provides a place for my CO2 manifold.  
-A temp controller in the freezer keeps it from doing its job too well and provides a great temp controlled bottle storage.
Picture
Another version from a HopHead on Facebook.  I really like the "floor" board. This model does have an uneven floor and this would help keep loose kegs upright.  I also like the idea of coming out of the side of the fridge.  Evidentially there are no coolant lines in there either.
2 Comments

Building a Beer Cave

10/1/2013

1 Comment

 
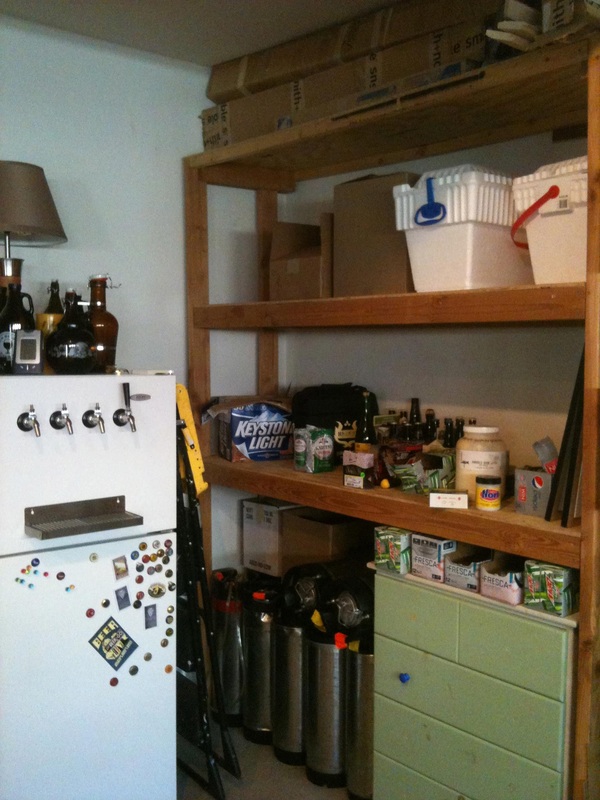
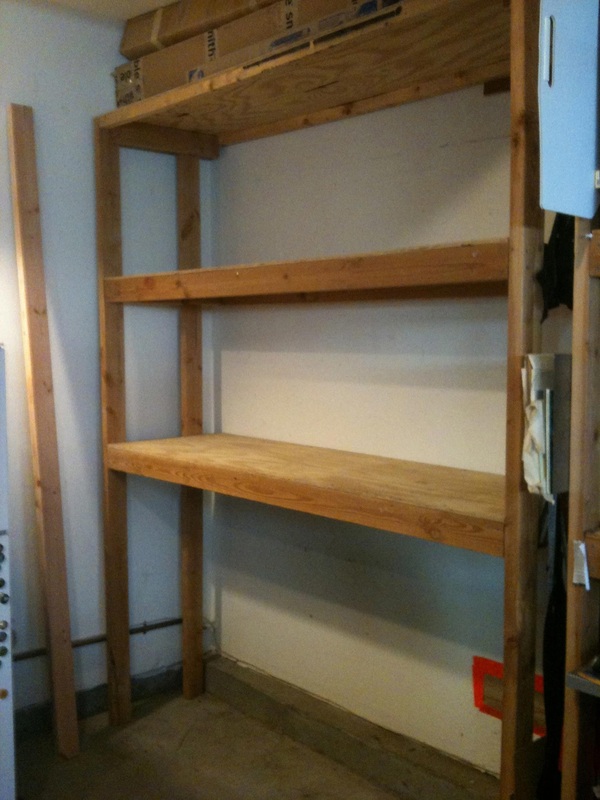
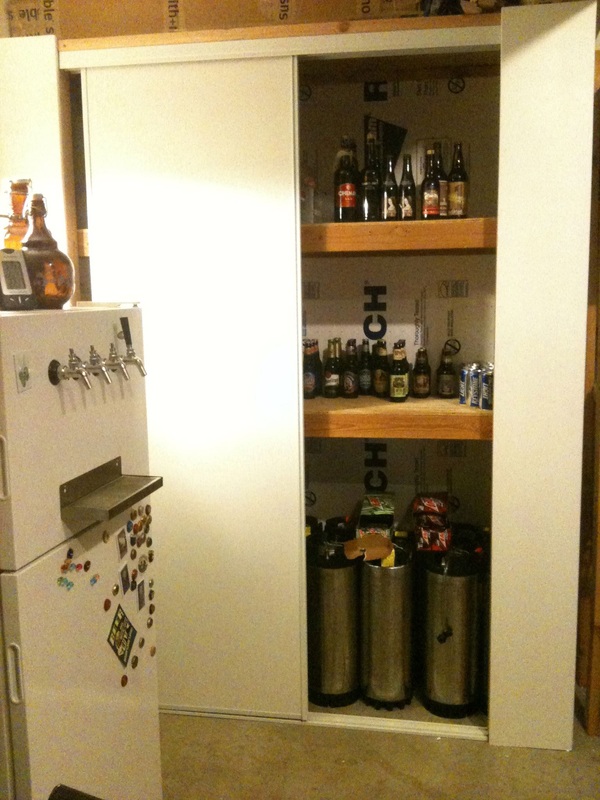
The key to this project is use what you already have because it will help keep expenses in check.  For my beer cave I started by reappropriating a section of garage shelving. As you can see, the beer cave frame and two of four beer cave walls have already been built for me. 
Before
Picture
After
Picture
First step is to get everything out of the way.  From here we squared up the unit and used a couple of screws to hold it in place so it wouldn't shift on us.  Then we  located the studs in the back wall and drove 4" screws into them to secure the shelving unit to the wall.  There are 3 screws in each shelf bottom for a total of nine. 
Picture
Picture
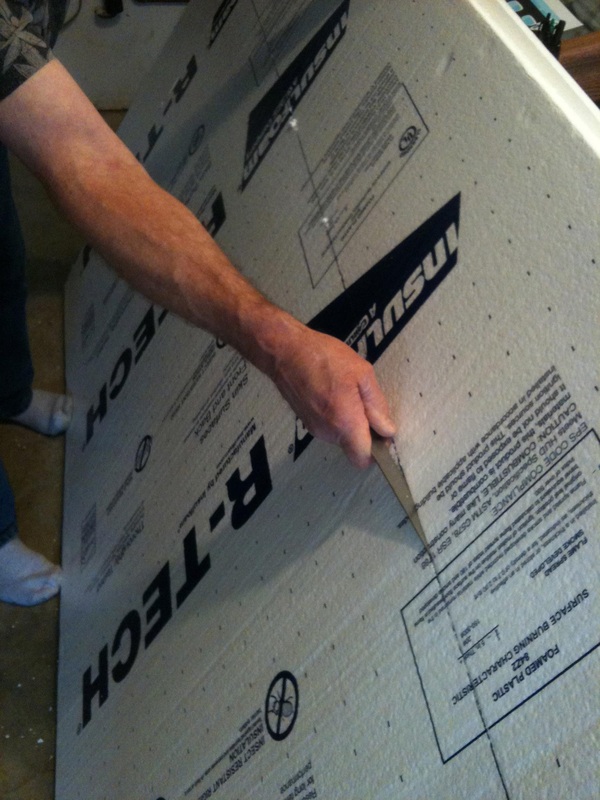
After the shelving unit was secured we started insulating the back and the side walls with an additional two inches styrofoam insulation.  We cut it on the long side of the measurements and stuffed it into back spaces against the garage wall. If you cut the styrofoam just the right size you may have to use glue to keep the styrofoam in place. The very top shelf bottom was also insulated.  The left hand wall was just shy of 2" from the wall so the styrofoam fit in there nice and snug.  All in all we got really lucky that we didn't have to fuss around with any glue or fasteners.
Picture
Picture

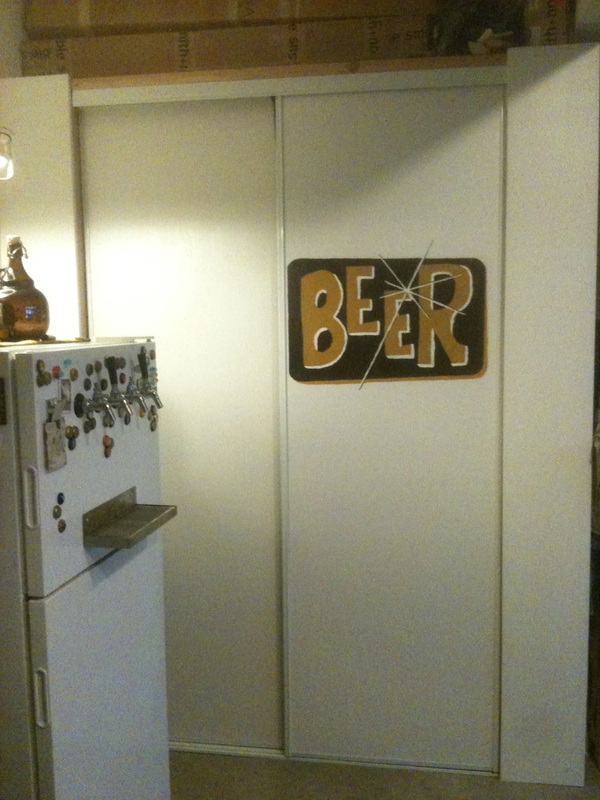
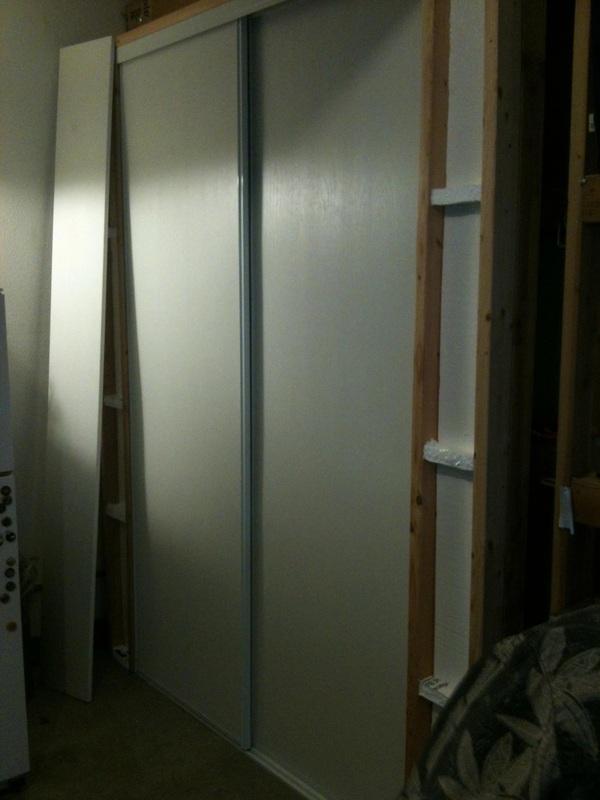
The stars really did align for this project.  We found a custom sliding door that had been returned to Home Depot that was the exact height we needed AND we got it for cheap! However, we did have to build a door jam to center and anchor the sliding door into position. This was the most difficult part of the project and something I couldn't have done on my own. I thought a head, though, and waited until my talented carpenter dad was visiting so he could build the door jam for me.


The total out-of-pocket for this project was just over $200. The key to keeping it that cheap is use what you have already and enlist your carpenter family or friends to help you.
At some point I will build (and by I, I mean my Dad) some extra shelving to divide up the top two shelves and provide extra storage space.  I am also thinking of putting under-shelf baskets in the space above the kegs.  This will be a great place for me to keep my beer books and bar rags.
1 Comment

Kegerator Conversion

9/30/2013

3 Comments

 
Disclaimer: This is only a journal of what I did to my refrigerator, use any of this narrative at your own risk, you are responsible for your own actions and you are responsible for any damage to property or person, yadda, yadda, yadda.  Make sure the refrigerator is unplugged before you start cutting AND make sure you know where all the coolant lines, electrical lines or any other important refrigerator features are before you start cutting.  If you aren't sure then don't do this

Picture
There are lots of options for kegerators out there and all of the commercial examples are undersized and overpriced.  You can make a kegerator out of almost any fridge or freezer.  I didn't want a chest freezer, while those are really nice, I didn't had the space or the will to clean off the top of the thing every time I needed to change kegs.  For my space and laziness I was looking for a stand up refrigerator.  
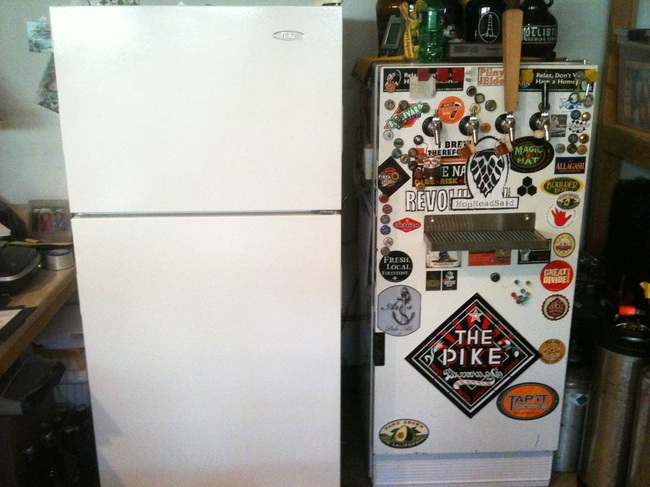
I found just the right size refrigerator (the snazzy new white one) on Craigslist for $100. Take your time when it comes to finding that right refrigerator, I spent nearly a year looking for one.  Will it take that long, probably not if you live in any kind of population center but I wanted to feel out the prospects (what kinds are usually posted and how much) and learn how fast these things sell.

TIPS:
1. Make sure you insist that the refrigerator is plugged in and running before you move it to ensure that the fridge works properly.
2. Go with a buddy.  I didn't and I had that "weird" feeling when I stepped into the house to move refrigerator to my van.  

The fridge on the right has been a trooper, salvaged from a trailer house my parents used to live in (long story) and brought half way across the country to SoCal.  I cut my teeth so to speak on this fridge.  I learned how to use a hole saw and assemble all the draught components.  It worked great so why the new fridge? Well, it was time to upgrade and the new fridge measured nearly 10 inches deeper which meant room for two more kegs! Don't worry about that old fridge, it is enjoying retirement.

Picture
Picture
Picture
Picture
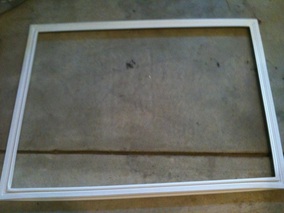
Step 1: Remove and Modify the doors.
Why would I do this?  Because, the door moldings reach too far into the refrigerator and the door will not close tightly when it is full of kegs.  

The doors remove pretty easily. Remove the hinge cover from the top hinge located on top of the freezer.  This will give you access to the bottom door hinge and then loosen the screws there and you can easily remove the bottom door from the refrigerator. 

The next thing I did after I removed the doors was remove the magnetic seal from around the edge.  This gave me a guide to follow with my Dremel tool as I cut around the INSIDE of the groove that held the magnetic seal.  Be sure to cut along the inside of the magnetic seal's groove to preserve the groove and ensure the magnetic seal will be held in place when you are finished with this project.

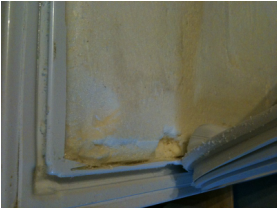
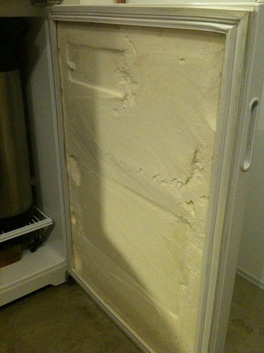
Once you have cut around the inside of the groove it is time to pull the plastic molding off the door. This is the messiest part and you will want to do this outside. Make sure you wear a dust mask as the door is probably filled with expandable foam which will "dust" apart when you start prying off the plastic molding.  This was also the harder part of the project as the foam acts like a glue and doesn't like to let go.

When I was done, I used a sheetrock planing file to smooth out the inside of the doors.  This was for cosmetic reasons and it was very messy.  If you do this be sure to wear a dust mask and do it outside. At some point I plan on cutting a piece of plastic shower insert to size and fitting it under the gasket, just to clean it up a bit.

Depending on how much space you want/need in the freezer you may want to repeat these steps on the freezer door. 

TIPS:
1. Pulling the molding off the inside was the hardest part.  I could only get it of in small chunks and had to use a small hand saw to cut behind some of the bigger molded parts, like the butter tray, to get the plastic off.
2. Once you remove the door molding the door probably won't turn off the light when it closes because the molding was shaped to hit the switch.  You will want to tape the switch down in the off position or remove the light.
Picture
Picture
Picture
Step 2: Prep for draught components.
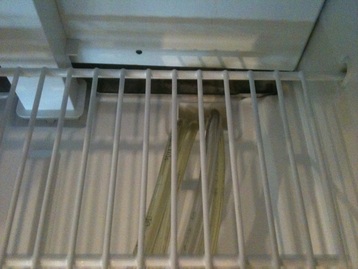
Before you start measuring and cutting holes you will have to decide where you want your taps situated.  This particular model of refrigerator (Haier HTE14WAAWW-02)has two vent holes conveniently located in the floor of the freezer making it possible to route the tap lines through the freezer.  So I decided to mount my taps on the freezer door.

The planning part is pretty straight forward.  Find the vertical center of the door and mark it with a pencil.  Next plan for the horizontal height of your taps. Keep in mind that your tap handles will be at least four inches (maybe more) higher than your holes.  This is important especially if the handle height will impede the freezer door from opening or if the handles will stick out above the top of the fridge. The latter can be a mild to major annoyance if you use the top of your fridge as a shelf, like I do, and accidentally hit the tap handle and pour beer all over the floor.

After you have decided on the horizontal line, use a level for this step, measure out 2 inches or more to the left an right of the middle line and mark your first two tap holes.  Measure out 4 inches (or the same interval you used for the first two holes) from each of those marks and mark the next two holes.  Repeat as needed.  

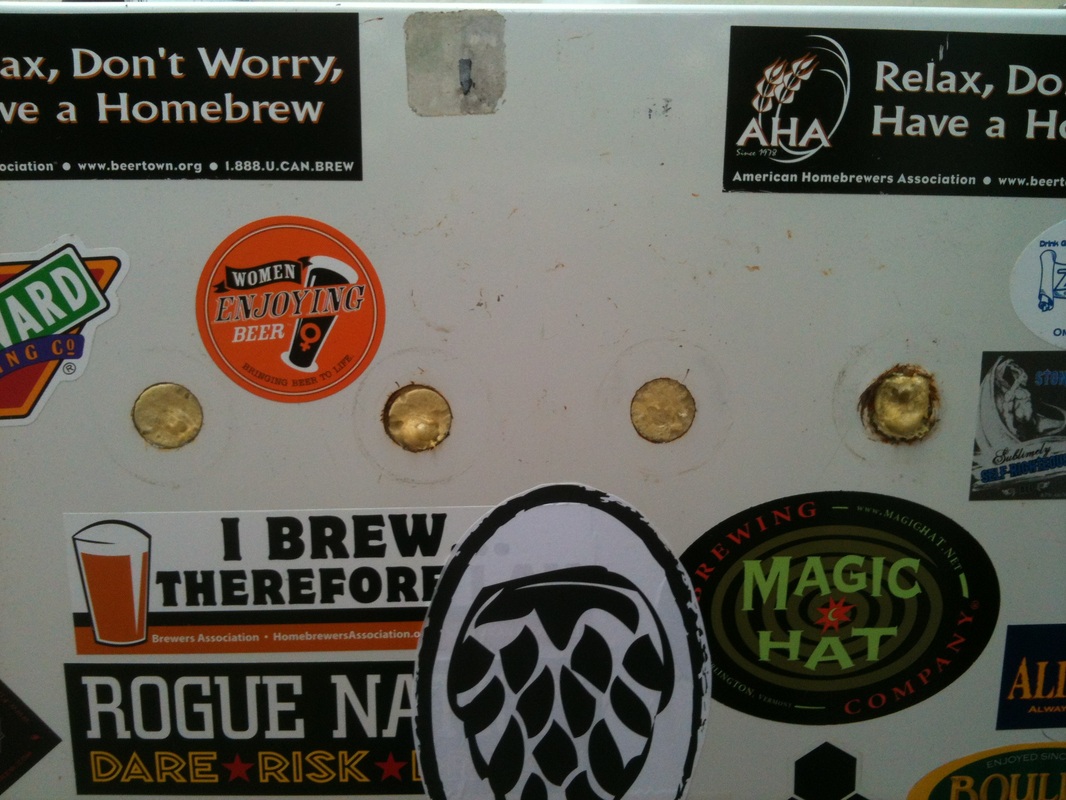
Drill pilot holes on each of your marks.  This will help guide your hole saw.  Just a quick note on hole saws. Spend the extra $10 and get a quality metal hole saw. Sometimes you can find these at at homebrew shops and you can bet that they will be the correct size for your tap shanks, that way.  I used a cheap hole saw on my first fridge and it tore the metal apart and it fell apart after one hole.  Luckily the tap collar covered up the mess but I learned my lesson and now I am passing that nugget on to you.

Drill through from the outside first and the tapping part of the hole saw will probably come through the plastic or foam on the inside of the door. This will give you a guide to follow so you can clean out the foam around each of the tap holes from the inside. Use a regular wood/plastic hole saw to enlarge the hole on the inside but do not cut through the door.  You are only doing this to make the inside hole big enough so the shank collar nut, the part that secures the tap to the refrigerator door, will tighten securely to the metal part of the refrigerator door.

Tips:
1. If you are going to use the freezer then you will want a temp controller to keep the freezer from freezing the beer in your tap lines.  You can find these at homebrew shops as well and range from $75 to $150.  Go with the cheaper one it will do everything you need it to do like turn your refrigerator on when it gets too warm and turn it off before your beer freezes.
2. 4 inches is a good width for your tap holes.  Any closer and it gets pretty cramped while you have your hand on the tap handle.  You can go wider of course but my four taps are 12 inches apart on center and my drip tray is 13 inches, which is a standard size. Any larger and the price of the stainless steel drip trays become pretty spendy and custom sizing on stainless steel is cost prohibitive. 
Picture
Picture
Picture
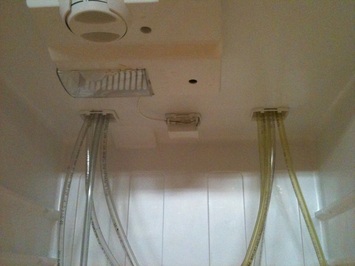
Gas and beer lines coming through into the refrigerator.

Step 3: Assembling the beer and gas lines.
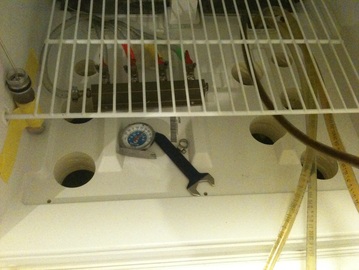
At first I fed the gas and beer lines through the vent holes in the bottom of the freezer.  They are still there today but I found I couldn't get the refrigerator cold enough with those vents full of tubing so I decided to use my wood/plastic hole saw and cut a few more vent holes.
Picture
The fridge temp sits right around 44 degrees, after I cut the extra vent holes in the freezer floor, while the freezer cools down to 35 degrees. As a result of running my beer lines through the freezer I inadvertently created a wonderful dorm sized beer fridge. It is just the right size to keep a small but diverse selection of craft beer chilly and ready at a moments notice.
Picture
Step 4: Miscellaneous 
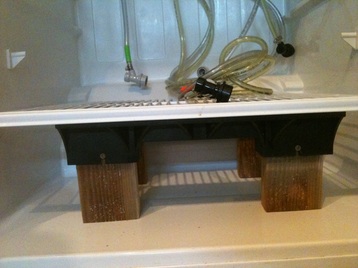
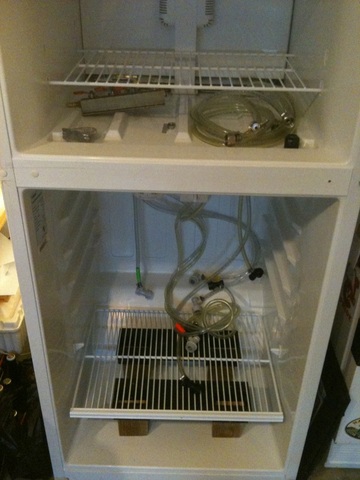
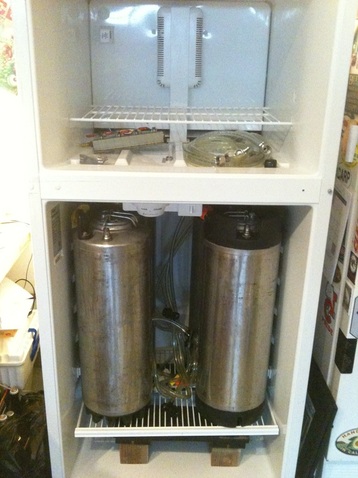
There is always a couple of extra projects that turn up as a result of converting anything and kegerators are no different.  Because of the compressor I needed to build a small shelf so I could at least fit 4 kegs inside the fridge.My old fridge was so old that the icebox was in the refrigerator and the temp controller was fastened to the side!  The new fridge's compressor is located in the bottom which meant that I had to build a small shelf for the kegs to sit.  Without the shelf there would only be room for 2 kegs. Not acceptable!  I used some left over shaving from the fridge and built a stand using some scrap 2x4's and left over shelf bracing. This particular shelf bracing (that is one connected piece in the front) allowed me to level the shelving. You can see I used two sets and each keg sits on one of the 2x4's so there is plenty of support for a full keg. At some point I will dress up those shelf stands but that can wait as it is mostly cosmetic and almost always hidden.

To compound the lost space do to the compressor the temp controller and fridge light are mounted on to the top and just off center to the left so that makes it difficult to load kegs in and out of the left or put an extra keg behind the temp controller.

Tips:
1. Keep all the wire shelving. You never know when they will come in handy as they are custom built to fit the fridge.
2. The glass shelving is too weak to use as a shelf for 160+ pounds of beer and kegs.
3.  Research the ideal (one that easily fits a predetermined number of kegs without obstructions) inside configuration  refrigerator.
Picture
A look inside before the doors were attached.
Picture
Double checking the space before I put the doors back on.
Picture
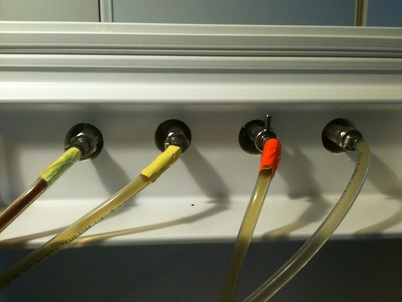
I decided to include this picture so you can see how the tap shanks and beer lines fit against the back the freezer door. Also, notice the color coded tape on the lines.  I used the same colors on my gas manifold and near the quick connects of the beer and gas lines.  This is a great way to keep your lines and kegs organized so when it is time to change out an empty keg you get the right lines and kegs swapped and hooked up to the correct taps.
Picture
Step 5: Gas hookup.

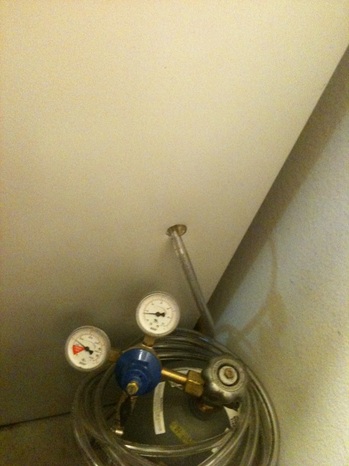
The last thing to do is use your hole saw again and drill through the side of the fridge so you can run your gas line into the fridge.  You shouldn't put your tank and regulators in the fridge if it gets down to the low 30's.  This can throw off the regulator readings and it just takes up space.  Fill that space with beer you will be much happier if you do!

It is ALIVE!

Picture
What happened to that old refrigerator you ask.  Well it is living out the rest of its life in retirement as my fermentation chamber.  I moved it outside next to my brewing equipment and now all I have to do is pump my chilled wort into the fermentor.  I used to have to fill the fermentor (usually 11 gallons) drag it across the ground and garage floor to a table near the refrigerator.  From there I would have to step on a step stool to lift the fermentor high enough to clear the refrigerator's bottom shelf. A PITA to say the least but I never spilled any in all the times I did that.

I filled all the former tap holes with expanding foam and trimmed off the excess when it was cured. This helps to keep the temp steady, of course, but it also helps keep the fruit flies out!  Something really important, dontcha think?
Picture
Picture
3 Comments

Festival Survival Tips

7/30/2012

4 Comments

 
Picture
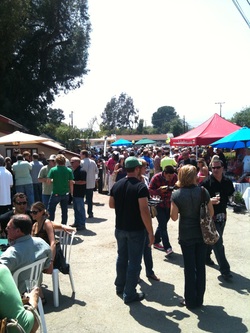
Beer festivals are just plain fun but sometimes they can be a little TOO much fun if you don’t take a few precautions.  Help me build a list of survival tips for festival newbies to ensure their first festival isn’t their last.

Rules:

1.  I am looking for tips that range from the obvious to the obscure.

2.  Add your tip in the comment.

3.  Include your facebook/twitter/blog info.

4.  You can comment on Facebook or Twitter and I will copy the info into the post

5.  I reserve the right to edit and/or remove any offensive posts.

I will add two obvious ones to get this page started.


Picture
EAT before you go, avoid the temptation of diving in and drinking on an empty stomach. This will almost certainly ensure your early departure from the event and besides you don’t want to be remembered as “that guy who blew chow” Most festivals have food but the prices can be high (you already paid a bunch to get in the door) and the quality can be suspect. Besides you’re there for the beer. So eat a big before you go. Avoid spicy foods so you don’t destroy your palate before you have had a chance to taste that new eleventeen hopped, hop-rocket, quadruple IPA.

Picture
DRINK lots of water. I like to drink an ounce or two between each taster. Not only will this help cleanse your palate but it will help you stay hydrated and forces you to pace yourself. Be sure to bring your own water bottle just incase there isn’t a readily available water source.

Below you will find comments that I copied from my old blog format here.  They may be a year old but sound advice never ages!

4 Comments

style.profile: American Stout

6/6/2012

0 Comments

 
Picture
13E.  American Stout

Examples:  Rogue Shakespeare Stout, Deschutes Obsidian Stout, Sierra Nevada Stout
Serving Temp: 45°- 50°
Glassware: Pint Glass, Mug

Aroma: Will be full of roasted malt, which gives it a coffee-like aroma.  There may also be hints of chocolate or cocoa as well as American grown hops.
Appearance: The beer will pour jet black and opaque with garnet highlights around the edges with a thick and a long lasting tan head.
Flavor: You can expect a lot of roasted malt flavors of burnt coffee or bittersweet chocolate.  The burnt flavors shouldn’t be unpleasant and are often quickly replaced by a much smoother and sweeter chocolate flavor.  Citrus or resiny hop flavors can be present.
Mouthfeel: You can expect a well-carbonated, medium to full bodied beer with a dry and slightly astringent finish due to the roasted barley that was used in the brewing.
Food Pairings: Cuisine: Barbecue. Cheese: buttery, earthy.  Dessert: chocolate. Meat: beef, shellfish, smoked, grilled, game.

HopHeadSaid: Beers in this beer style can span a wide range of body and flavors but this almost ensures you will find that perfect American stout to suit your tastes or food pairing.  I suggest pairing your favorite stout with a chocolate dessert.  The sweetness in the deserts will help balance the roasty flavors in the stout and the stout will keep the dessert from becoming to cloying.  The coffee-like roastieness is often a pleasant layer with sweets, as well. If desserts aren’t your thang, then try breakfast foods! Consider replacing your morning coffee with a stout, it has a similar flavor profile as the coffee and its carbonation will help to scrub those savory or sweet flavors off the palate.  I won’t even get into the slight warming sensation you get with the stout.


0 Comments

style.profile: Extra Special/Strong Bitter (English Pale Ale)

4/29/2012

0 Comments

 
Picture

Style 8: English Pale Ale8C.  Extra Special/Strong Bitter 

Examples: Redhook ESB, Fuller’s ESB, Youngs Ram Rod, Bass Pale Ale, Morland Old Speckled Hen, Anderson Valley Boont ESB

Serving Temp: 45°- 50°
Glassware: Pint Glass, mug

Aroma: Hop aroma can range from low to high but will likely have a sawdust-like or earthy floral spice of traditional UK hops. Moderate caramel malt aroma and/or noticeable fruity esters will likely be present.
Appearance: The beer will pour clear, deep gold to copper with an off-white head.  Head size and density will vary depending on carbonation level – cask, nitro, force carbonated, etc.
Flavor: A pronounced bitterness will be balanced by a caramelly malt sweetness.  As the beer moves across the palate nutty or biscuity flavors may surface and mix with fruity esters.
Mouthfeel: These beers are generally medium bodied with low to medium carbonation.

Food Pairings: Cuisine: English, fried, roasted. Cheese: buttery (Gouda, Havarti, Swiss) Earthy (Blue, Brie, Winnemere) nutty (Asiago, Fontina, Parmesan). Meat: Pork, Game.

HopHeadSaid: These beers are great to pair with foods because their nutty/biscuity flavors resonate with many types of food but especially cheeses.  The earthy hop flavors also pair well with many cheeses and add a counterpoint to any residual sweetness or another layer interest that wasn’t there before.  Their medium intensity (flavor, body, alcohol) means their flavors won’t overpower many entrée’s and they can hold their own against all but the most intense foods or desserts.  In short – I guess I shoulda said this earlier- you can pair these beers with just about anything and not go wrong. 


0 Comments

style.profile: Robust Porter

4/27/2012

0 Comments

 
Picture
Style 12: Porter
12B.  Robust Porter

Examples:  Anchor Porter, Sierra Nevada Porter, Great Divide Saint Bridget’s Porter, Deschutes Black Butte Porter
Serving Temp: 50°- 55°
Glassware: Pint Glass, Mug

Aroma: Roasty aroma should be noticeable may be pronounced with coffee and/or chocolate undertones.
Appearance: Pours a dark brown with garnet highlights with a fluffy tan head.
Flavor: Noticeable roasty malt flavors of strong coffee, dark chocolate or slightly burnt toast.  
Mouthfeel: Medium-full body that may finish drier because of roasty characters. Warming alcohol feeling may be present.

Food Pairings: Cuisine: barbecue, Mexican.  Cheese: earthy. Dessert: chocolate. Meat: beef, smoked meat, grilled meat.

HopHeadSaid: Robust porters are really easy to pair with food.  Their roasty notes resonate with grilled foods and their flavor intensities ensure they will hold their own in most pairings. Robust porters also pair well with many desserts.  Their roasty flavors help balance sweeter desserts while their dark chocolate/coffee flavors resonate well with chocolate desserts.

0 Comments

style.profile: American Brown Ale

4/27/2012

0 Comments

 
Picture
Style 10: American Ale
10C.  American Brown Ale

Examples: Indian Brown Ale, Bender, Moose Drool Brown Ale
Serving Temp: 40°- 45°
Glassware: Pint Glass, Mug

Aroma: Hints of sweet chocolate, caramel with toasted nuts are typical of this style.  Some American browns have pronounced hop aromas especially if they are dry hopped.
Appearance: Pours clear brown to dark brown with a light tan head.
Flavor:  Pronounced sweet malty flavors reminiscent of caramel and chocolate are balanced by elevated hop flavors and bitterness.
Mouthfeel:  Medium-full body that finish fairly dry due to the hops and elevated carbonation levels.

Food Pairings: Cuisine: Barbecue. Cheese: Earthy, Nutty. Meat: beef. Dessert: Chocolate.

HopHeadSaid:  I prefer American brown ales over English brown ales because of the elevated hop profiles. The hop profiles help balance the toasted caramely/chocolate sweetness keeping the beer refreshing without limiting the beer’s pairing ability. The assertive hop intensity means the malt flavors have to be increased making it a great pairing beer for grilled foods, assertive cheeses and chocolate desserts.

0 Comments

style.profile: Blonde Ale

4/9/2012

0 Comments

 
Picture
Style 6: Light Hybrid Beer
6B.  Blonde Ale

Examples: Shipyard Export Ale, Twilight ale,
Serving Temp: 40°- 45°
Glassware: Pint Glass, Mug

Aroma: Light hop and sweet aromas, fruity esters common. 
Appearance:  Pours a clear yellow to gold with a white head that has some staying power. 
Flavor: Light sweet bread flavors balanced beer. Hop bitterness is pronounced but the malt is the dominant flavor.
Mouthfeel:  A smooth, refreshing, medium bodied beer that finishes fairly dry.

Food Pairings: Italian cuisine, Middle Eastern cuisine, soft young cheeses with spicy hot peppers such as Monterey Jack.  Meat: poultry or fish.

HopHeadSaid: These are great hot summer day beers.  They are more flavorful than American lagers but comparable ABV’s so you can enjoy a few without much worry of overdoing it.  Blonde ales also pair well with food because their sweet malt flavors help to cut the spicy foods and their light flavor intensity ensures they won’t overpower any entrée. 

0 Comments

style.profile: Cream Ale

4/9/2012

2 Comments

 
Picture
Style 6: Light Hybrid Beer
6A.  Cream Ale

Examples: Genesee Cram Ale, New Glarus Spotted Cow, Little Kings Cream Ale
Serving Temp: 40°- 45°
Glassware: Pint Glass, Mug
Aroma: Faint corn-like aroma, sweet with little or no hop aroma.
Appearance:  Pours a pale yellow to gold with brilliant clarity and a white head that recedes quickly.
Flavor: Neither hops nor malt stand out but it is balanced towards sweet instead of bitter. There will likely be a noticeable corn flavor present because corn (an adjunct used to lighten the body) was used in the brewing process.
Mouthfeel:  Generally a light and crisp, medium bodied beer with high carbonation but a smooth mouthfeel.

Food Pairings: Cheese: soft (Burratta, Havarti, Monterey Jack)  Meat: poultry or fish 

HopHeadSaid: Sensory speaking, I am corn sensitive.  I have a low tolerance for corn flavors and/or DMS (a chemical compound reminiscent of cooked corn, usually an off-flavor) and when they are present in my beer that is generally all I can focus on making it hard to enjoy any other flavors in these beers. So because these beers use corn as an ingredient it is hard for me to enjoy any of these beers.  That said … Spotted Cow by New Glarus is definitely my favorite of the cream ales.  It has been several years since I have enjoyed one but I don’t recall any corn flavors at all and as a matter of fact there was so little corn flavor I thought it was a wheat beer until I cross referenced it in the BJCP style guidelines. However, if you look you might be able to find flavored or spiced cream ales.  I found one that was Chai spiced and the corn sweetness paired well with the spice.  The spice also covered up any corny flavors and so I enjoyed the beer very much.  

2 Comments
<<Previous
    Picture
    Picture
    Picture
    Picture
    Use the categories below to narrow your search.

    Categories

    All
    Amber
    Amber Lager
    American Ale
    American Amber
    American Brown Ale
    American Stout
    Barleywine
    Beer Cave
    Beer Closet
    Beer Styles
    Belgian Dark Strong
    Bjcp
    Blonde Ale
    Bock
    Bohemian Pilsner
    Classic American Pilsner
    Cleaning
    Cream Ale
    Dark American Lager
    Dark Lager
    Dopplebock
    Dortmunder Export
    Eisbock
    English Pale Ale
    Esb
    Festival
    Flute
    German Pilsner
    Glassware
    Goblet
    Homebrew Recipe
    Hop Dehydrator
    Ipa
    Kegerator
    Kegs
    Light Hybrid Beer
    Light Lager
    Lightstruck
    Lite American Lager
    Maibock
    Marzen
    Mug
    Munich Dunkel
    Munich Helles
    Nonic
    Off Flavors
    Off-flavors
    Oktoberfest
    Oxidation
    Pilsner
    Pint
    Porter
    Premium American Lager
    Robust Porter
    Schwarzbier
    Shaker
    Snifter
    Specialty
    Standard American Lager
    Stange
    Storage
    Style Profile
    Traditional Bock
    Tulip
    Vienna Lager
    Weizen
    Wine


    perfect.pint posters and photographs

    -You are welcome to download, print or use these images.
    -Posters are intented for private uses only, any commercial use must be authorized by Curtis Taylor.
    -Posters are 11" x 17".  
    -Photographs vary in size from 8" x 8" to 16" x 16".
    -Black border is indented 1/2" from the edge of the paper on posters.
    -Please do not forward or post these images on any social media but rather link to this page.
    RSS Feed

    Archives

    October 2013
    September 2013
    July 2012
    June 2012
    April 2012
    March 2012
    February 2012

All Content © Curtis Taylor 2010-2020