
Disclaimer: This is only a journal of what I did to my refrigerator, use any of this narrative at your own risk, you are responsible for your own actions and you are responsible for any damage to property or person, yadda, yadda, yadda. Make sure the refrigerator is unplugged before you start cutting AND make sure you know where all the coolant lines, electrical lines or any other important refrigerator features are before you start cutting. If you aren't sure then don't do this
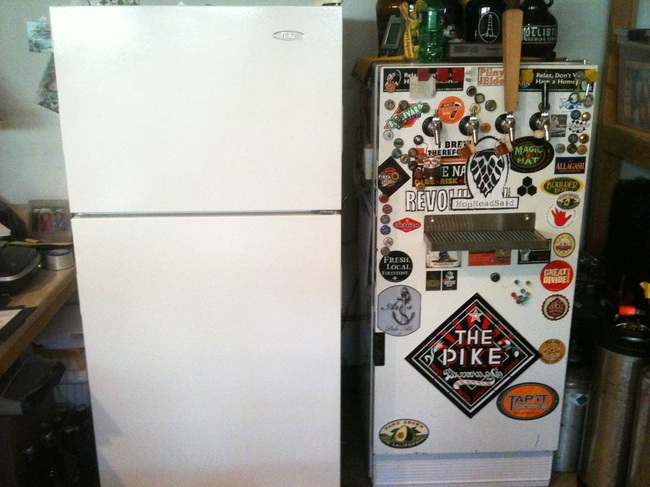
There are lots of options for kegerators out there and all of the commercial examples are undersized and overpriced. You can make a kegerator out of almost any fridge or freezer. I didn't want a chest freezer, while those are really nice, I didn't had the space or the will to clean off the top of the thing every time I needed to change kegs. For my space and laziness I was looking for a stand up refrigerator.
I found just the right size refrigerator (the snazzy new white one) on Craigslist for $100. Take your time when it comes to finding that right refrigerator, I spent nearly a year looking for one. Will it take that long, probably not if you live in any kind of population center but I wanted to feel out the prospects (what kinds are usually posted and how much) and learn how fast these things sell.
TIPS:
1. Make sure you insist that the refrigerator is plugged in and running before you move it to ensure that the fridge works properly.
2. Go with a buddy. I didn't and I had that "weird" feeling when I stepped into the house to move refrigerator to my van.
The fridge on the right has been a trooper, salvaged from a trailer house my parents used to live in (long story) and brought half way across the country to SoCal. I cut my teeth so to speak on this fridge. I learned how to use a hole saw and assemble all the draught components. It worked great so why the new fridge? Well, it was time to upgrade and the new fridge measured nearly 10 inches deeper which meant room for two more kegs! Don't worry about that old fridge, it is enjoying retirement.
 |  |
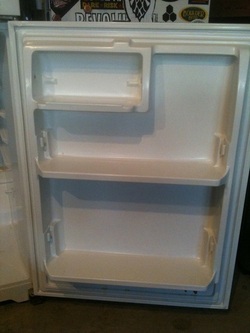
Step 1: Remove and Modify the doors.
Why would I do this? Because, the door moldings reach too far into the refrigerator and the door will not close tightly when it is full of kegs.
The doors remove pretty easily. Remove the hinge cover from the top hinge located on top of the freezer. This will give you access to the bottom door hinge and then loosen the screws there and you can easily remove the bottom door from the refrigerator.
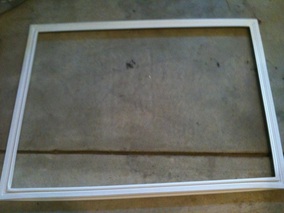
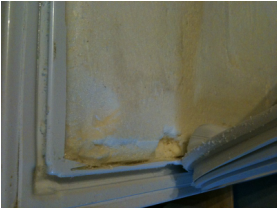
The next thing I did after I removed the doors was remove the magnetic seal from around the edge. This gave me a guide to follow with my Dremel tool as I cut around the INSIDE of the groove that held the magnetic seal. Be sure to cut along the inside of the magnetic seal's groove to preserve the groove and ensure the magnetic seal will be held in place when you are finished with this project.
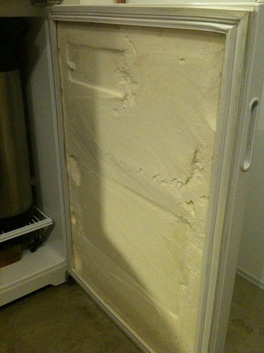
Once you have cut around the inside of the groove it is time to pull the plastic molding off the door. This is the messiest part and you will want to do this outside. Make sure you wear a dust mask as the door is probably filled with expandable foam which will "dust" apart when you start prying off the plastic molding. This was also the harder part of the project as the foam acts like a glue and doesn't like to let go.
When I was done, I used a sheetrock planing file to smooth out the inside of the doors. This was for cosmetic reasons and it was very messy. If you do this be sure to wear a dust mask and do it outside. At some point I plan on cutting a piece of plastic shower insert to size and fitting it under the gasket, just to clean it up a bit.
Depending on how much space you want/need in the freezer you may want to repeat these steps on the freezer door.
TIPS:
1. Pulling the molding off the inside was the hardest part. I could only get it of in small chunks and had to use a small hand saw to cut behind some of the bigger molded parts, like the butter tray, to get the plastic off.
2. Once you remove the door molding the door probably won't turn off the light when it closes because the molding was shaped to hit the switch. You will want to tape the switch down in the off position or remove the light.
Why would I do this? Because, the door moldings reach too far into the refrigerator and the door will not close tightly when it is full of kegs.
The doors remove pretty easily. Remove the hinge cover from the top hinge located on top of the freezer. This will give you access to the bottom door hinge and then loosen the screws there and you can easily remove the bottom door from the refrigerator.
The next thing I did after I removed the doors was remove the magnetic seal from around the edge. This gave me a guide to follow with my Dremel tool as I cut around the INSIDE of the groove that held the magnetic seal. Be sure to cut along the inside of the magnetic seal's groove to preserve the groove and ensure the magnetic seal will be held in place when you are finished with this project.
Once you have cut around the inside of the groove it is time to pull the plastic molding off the door. This is the messiest part and you will want to do this outside. Make sure you wear a dust mask as the door is probably filled with expandable foam which will "dust" apart when you start prying off the plastic molding. This was also the harder part of the project as the foam acts like a glue and doesn't like to let go.
When I was done, I used a sheetrock planing file to smooth out the inside of the doors. This was for cosmetic reasons and it was very messy. If you do this be sure to wear a dust mask and do it outside. At some point I plan on cutting a piece of plastic shower insert to size and fitting it under the gasket, just to clean it up a bit.
Depending on how much space you want/need in the freezer you may want to repeat these steps on the freezer door.
TIPS:
1. Pulling the molding off the inside was the hardest part. I could only get it of in small chunks and had to use a small hand saw to cut behind some of the bigger molded parts, like the butter tray, to get the plastic off.
2. Once you remove the door molding the door probably won't turn off the light when it closes because the molding was shaped to hit the switch. You will want to tape the switch down in the off position or remove the light.
 |  |
Step 2: Prep for draught components.
Before you start measuring and cutting holes you will have to decide where you want your taps situated. This particular model of refrigerator (Haier HTE14WAAWW-02)has two vent holes conveniently located in the floor of the freezer making it possible to route the tap lines through the freezer. So I decided to mount my taps on the freezer door.
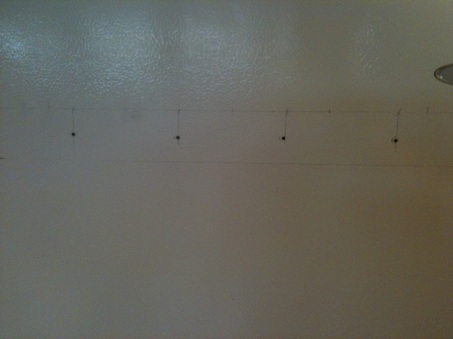
The planning part is pretty straight forward. Find the vertical center of the door and mark it with a pencil. Next plan for the horizontal height of your taps. Keep in mind that your tap handles will be at least four inches (maybe more) higher than your holes. This is important especially if the handle height will impede the freezer door from opening or if the handles will stick out above the top of the fridge. The latter can be a mild to major annoyance if you use the top of your fridge as a shelf, like I do, and accidentally hit the tap handle and pour beer all over the floor.
After you have decided on the horizontal line, use a level for this step, measure out 2 inches or more to the left an right of the middle line and mark your first two tap holes. Measure out 4 inches (or the same interval you used for the first two holes) from each of those marks and mark the next two holes. Repeat as needed.
Drill pilot holes on each of your marks. This will help guide your hole saw. Just a quick note on hole saws. Spend the extra $10 and get a quality metal hole saw. Sometimes you can find these at at homebrew shops and you can bet that they will be the correct size for your tap shanks, that way. I used a cheap hole saw on my first fridge and it tore the metal apart and it fell apart after one hole. Luckily the tap collar covered up the mess but I learned my lesson and now I am passing that nugget on to you.
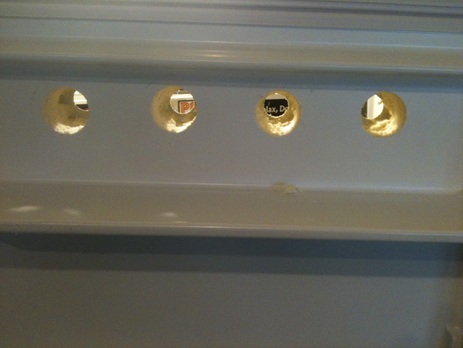
Drill through from the outside first and the tapping part of the hole saw will probably come through the plastic or foam on the inside of the door. This will give you a guide to follow so you can clean out the foam around each of the tap holes from the inside. Use a regular wood/plastic hole saw to enlarge the hole on the inside but do not cut through the door. You are only doing this to make the inside hole big enough so the shank collar nut, the part that secures the tap to the refrigerator door, will tighten securely to the metal part of the refrigerator door.
Tips:
1. If you are going to use the freezer then you will want a temp controller to keep the freezer from freezing the beer in your tap lines. You can find these at homebrew shops as well and range from $75 to $150. Go with the cheaper one it will do everything you need it to do like turn your refrigerator on when it gets too warm and turn it off before your beer freezes.
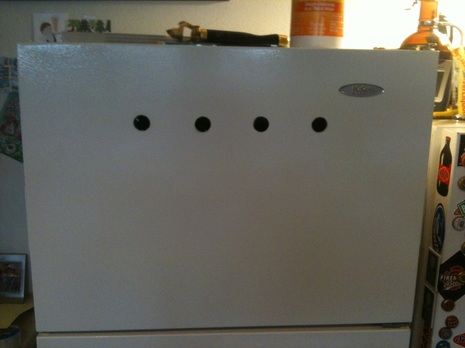
2. 4 inches is a good width for your tap holes. Any closer and it gets pretty cramped while you have your hand on the tap handle. You can go wider of course but my four taps are 12 inches apart on center and my drip tray is 13 inches, which is a standard size. Any larger and the price of the stainless steel drip trays become pretty spendy and custom sizing on stainless steel is cost prohibitive.
Before you start measuring and cutting holes you will have to decide where you want your taps situated. This particular model of refrigerator (Haier HTE14WAAWW-02)has two vent holes conveniently located in the floor of the freezer making it possible to route the tap lines through the freezer. So I decided to mount my taps on the freezer door.
The planning part is pretty straight forward. Find the vertical center of the door and mark it with a pencil. Next plan for the horizontal height of your taps. Keep in mind that your tap handles will be at least four inches (maybe more) higher than your holes. This is important especially if the handle height will impede the freezer door from opening or if the handles will stick out above the top of the fridge. The latter can be a mild to major annoyance if you use the top of your fridge as a shelf, like I do, and accidentally hit the tap handle and pour beer all over the floor.
After you have decided on the horizontal line, use a level for this step, measure out 2 inches or more to the left an right of the middle line and mark your first two tap holes. Measure out 4 inches (or the same interval you used for the first two holes) from each of those marks and mark the next two holes. Repeat as needed.
Drill pilot holes on each of your marks. This will help guide your hole saw. Just a quick note on hole saws. Spend the extra $10 and get a quality metal hole saw. Sometimes you can find these at at homebrew shops and you can bet that they will be the correct size for your tap shanks, that way. I used a cheap hole saw on my first fridge and it tore the metal apart and it fell apart after one hole. Luckily the tap collar covered up the mess but I learned my lesson and now I am passing that nugget on to you.
Drill through from the outside first and the tapping part of the hole saw will probably come through the plastic or foam on the inside of the door. This will give you a guide to follow so you can clean out the foam around each of the tap holes from the inside. Use a regular wood/plastic hole saw to enlarge the hole on the inside but do not cut through the door. You are only doing this to make the inside hole big enough so the shank collar nut, the part that secures the tap to the refrigerator door, will tighten securely to the metal part of the refrigerator door.
Tips:
1. If you are going to use the freezer then you will want a temp controller to keep the freezer from freezing the beer in your tap lines. You can find these at homebrew shops as well and range from $75 to $150. Go with the cheaper one it will do everything you need it to do like turn your refrigerator on when it gets too warm and turn it off before your beer freezes.
2. 4 inches is a good width for your tap holes. Any closer and it gets pretty cramped while you have your hand on the tap handle. You can go wider of course but my four taps are 12 inches apart on center and my drip tray is 13 inches, which is a standard size. Any larger and the price of the stainless steel drip trays become pretty spendy and custom sizing on stainless steel is cost prohibitive.
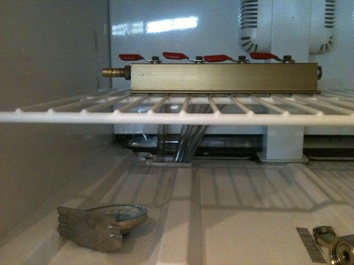 |  |

Gas and beer lines coming through into the refrigerator.
Step 3: Assembling the beer and gas lines.
At first I fed the gas and beer lines through the vent holes in the bottom of the freezer. They are still there today but I found I couldn't get the refrigerator cold enough with those vents full of tubing so I decided to use my wood/plastic hole saw and cut a few more vent holes.
The fridge temp sits right around 44 degrees, after I cut the extra vent holes in the freezer floor, while the freezer cools down to 35 degrees. As a result of running my beer lines through the freezer I inadvertently created a wonderful dorm sized beer fridge. It is just the right size to keep a small but diverse selection of craft beer chilly and ready at a moments notice.

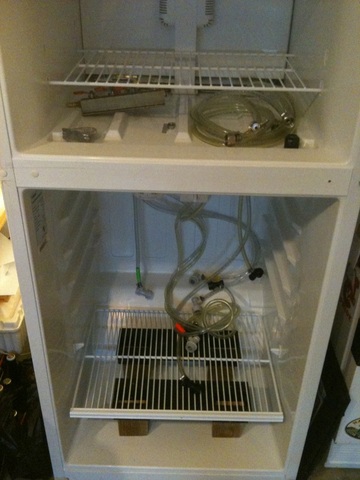
Step 4: Miscellaneous
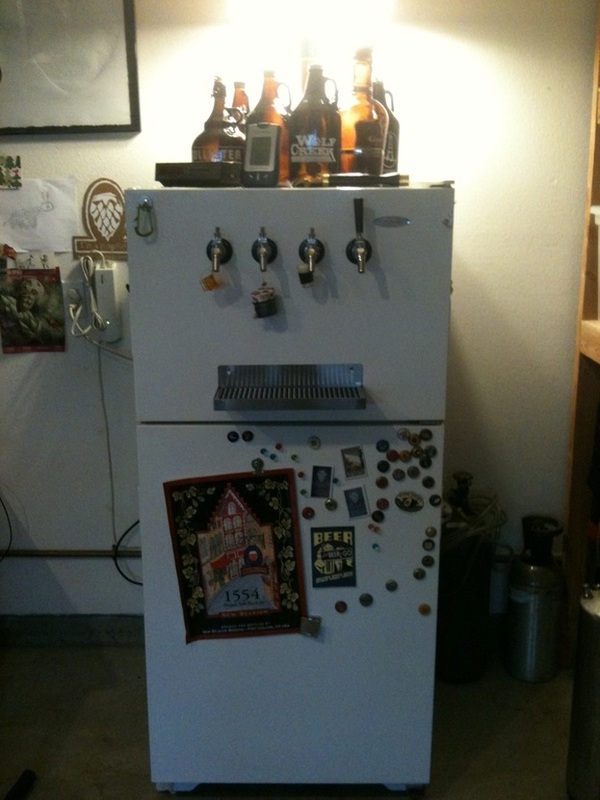
There is always a couple of extra projects that turn up as a result of converting anything and kegerators are no different. Because of the compressor I needed to build a small shelf so I could at least fit 4 kegs inside the fridge.My old fridge was so old that the icebox was in the refrigerator and the temp controller was fastened to the side! The new fridge's compressor is located in the bottom which meant that I had to build a small shelf for the kegs to sit. Without the shelf there would only be room for 2 kegs. Not acceptable! I used some left over shaving from the fridge and built a stand using some scrap 2x4's and left over shelf bracing. This particular shelf bracing (that is one connected piece in the front) allowed me to level the shelving. You can see I used two sets and each keg sits on one of the 2x4's so there is plenty of support for a full keg. At some point I will dress up those shelf stands but that can wait as it is mostly cosmetic and almost always hidden.
To compound the lost space do to the compressor the temp controller and fridge light are mounted on to the top and just off center to the left so that makes it difficult to load kegs in and out of the left or put an extra keg behind the temp controller.
Tips:
1. Keep all the wire shelving. You never know when they will come in handy as they are custom built to fit the fridge.
2. The glass shelving is too weak to use as a shelf for 160+ pounds of beer and kegs.
3. Research the ideal (one that easily fits a predetermined number of kegs without obstructions) inside configuration refrigerator.
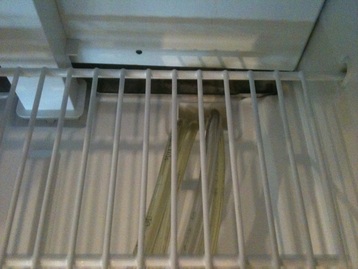
 A look inside before the doors were attached. |  Double checking the space before I put the doors back on. |

I decided to include this picture so you can see how the tap shanks and beer lines fit against the back the freezer door. Also, notice the color coded tape on the lines. I used the same colors on my gas manifold and near the quick connects of the beer and gas lines. This is a great way to keep your lines and kegs organized so when it is time to change out an empty keg you get the right lines and kegs swapped and hooked up to the correct taps.
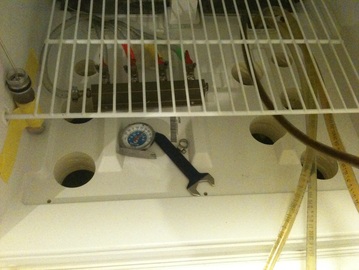
Step 5: Gas hookup.
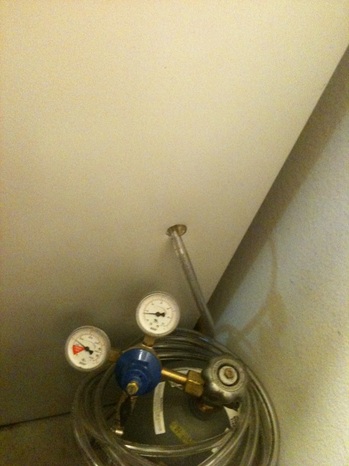
The last thing to do is use your hole saw again and drill through the side of the fridge so you can run your gas line into the fridge. You shouldn't put your tank and regulators in the fridge if it gets down to the low 30's. This can throw off the regulator readings and it just takes up space. Fill that space with beer you will be much happier if you do!
The last thing to do is use your hole saw again and drill through the side of the fridge so you can run your gas line into the fridge. You shouldn't put your tank and regulators in the fridge if it gets down to the low 30's. This can throw off the regulator readings and it just takes up space. Fill that space with beer you will be much happier if you do!
It is ALIVE!
What happened to that old refrigerator you ask. Well it is living out the rest of its life in retirement as my fermentation chamber. I moved it outside next to my brewing equipment and now all I have to do is pump my chilled wort into the fermentor. I used to have to fill the fermentor (usually 11 gallons) drag it across the ground and garage floor to a table near the refrigerator. From there I would have to step on a step stool to lift the fermentor high enough to clear the refrigerator's bottom shelf. A PITA to say the least but I never spilled any in all the times I did that.
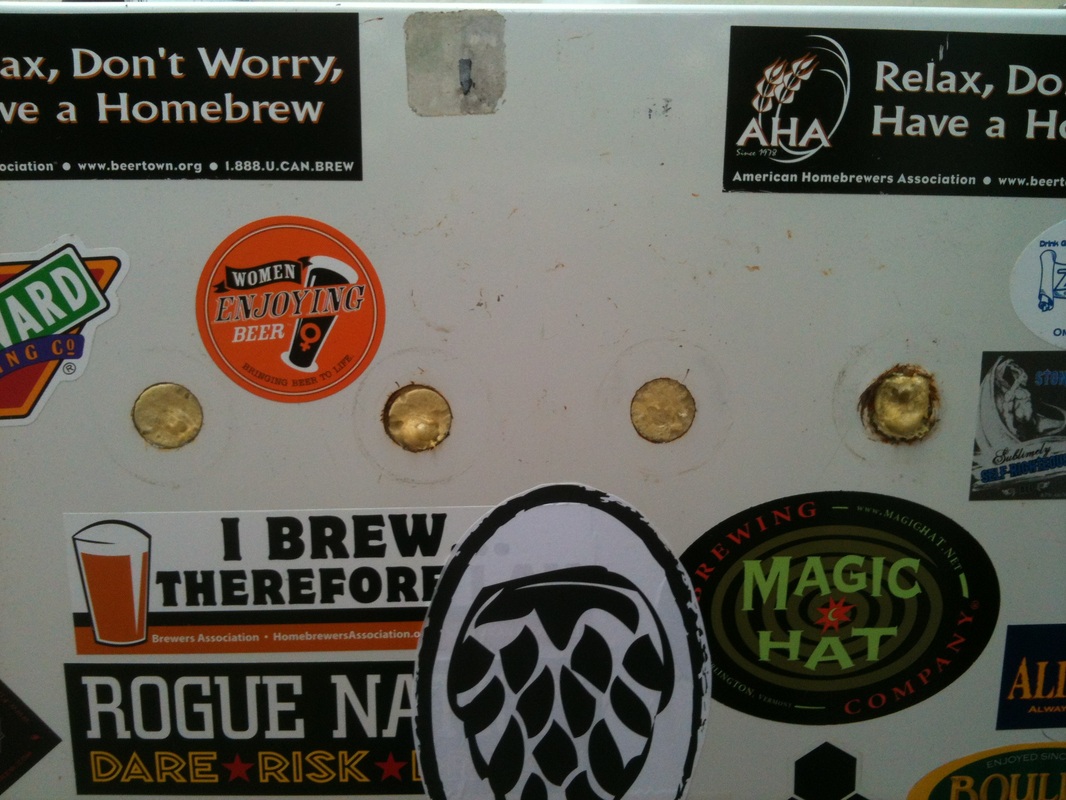
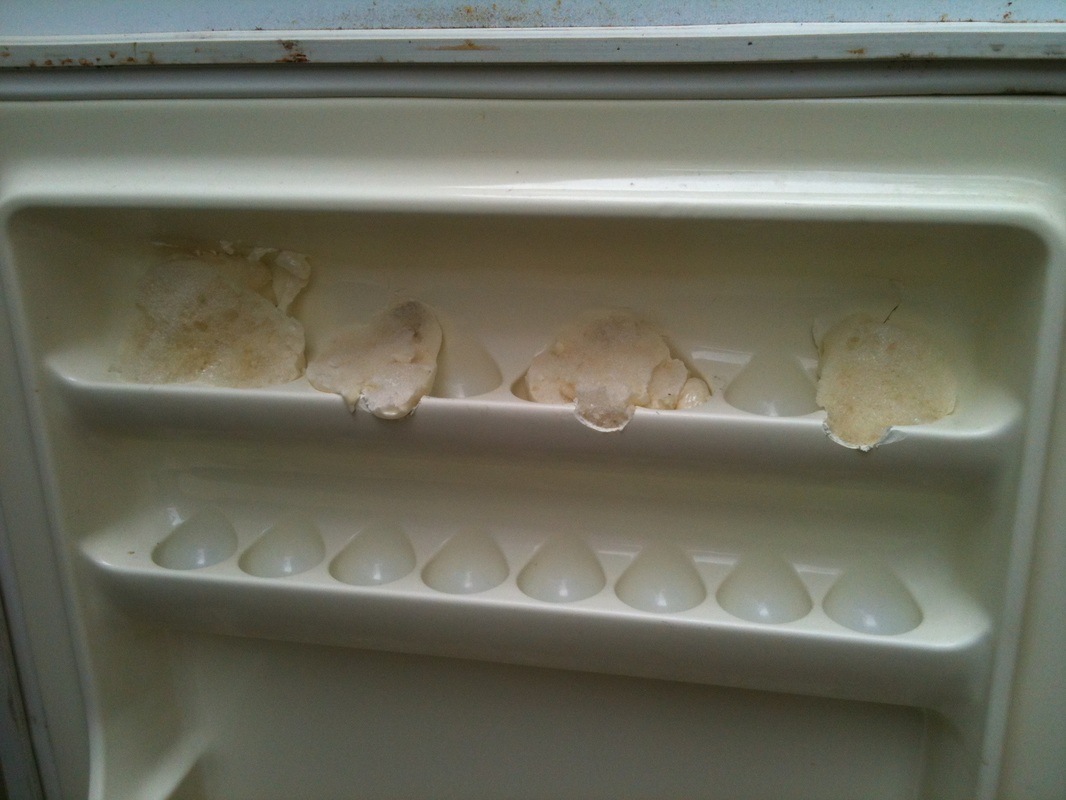
I filled all the former tap holes with expanding foam and trimmed off the excess when it was cured. This helps to keep the temp steady, of course, but it also helps keep the fruit flies out! Something really important, dontcha think?
I filled all the former tap holes with expanding foam and trimmed off the excess when it was cured. This helps to keep the temp steady, of course, but it also helps keep the fruit flies out! Something really important, dontcha think?
 |  |


 RSS Feed